By Ron Lane
Done correctly, there is a lot that can be learned and will help you build your beekeeping skills.
There is a step-by-step process for inspecting a deadout so valuable information is not lost or accidentally destroyed. The process is laid out below.
- Observe the hive and the area around it. Make notes of what you see and particularly any smells that seem unusual.
- Remove the outer cover, observe anything you see under it and add to your notes. You won’t always find anything but you are looking for anything out of the ordinary.
- Next, remove the inner cover and observe the top bar surfaces. Make a note of anything you see either on the inner cover or the top bars.
- Then look down between the frames to see if you can see the cluster. DO NOT remove frames at this time.
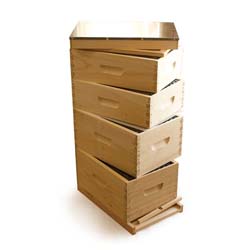
- Remove the hive boxes and carefully set them aside.
- The next step is to inspect the bottom board. The condition of the bees on the bottom board, their location/placement and age can reveal a lot about the colony.
- Finally, you can begin working through the frames in the boxes, beginning with the hive box above the bottom board and then working your way up through the next box.
Let’s take a look at some of the things you might discover.

Dead Bees on the Bottom Board
A winter cluster is formed with the older bees gathered on the outside 2 inches of the cluster. When the temperature falls to 41 F. or lower the bees on the outside of the cluster can become too cold to move inside the cluster for warmth. When this happens they can lose their grip and fall. By the way, this is a good reason not to knock on the side of the hive box to listen for a buzz.
This event will shrink the cluster size and if the cluster cannot expand to reach food in the hive then your bees can die from cold and starvation, even when resources are available. This may be indicated by a large pile of dead bees on the bottom board directly under the cluster.
Sick bees lose their grip even faster. A pile of bees directly under the cluster can sometimes indicate PMS. When you conduct your frame inspection you will want to check if the bees had contact with food stores or if they were isolated from it. Bees can die of starvation and only be a couple of cells away from food stores. This is such an ironic – and painful – discovery for the beekeeper!
Another observation to make when inspecting the bottom board is to see if the dead bees were all trying to exit the hive at once. If you find them piled up against the front entrance this may suggest poisoning. They are trying to die outside of the hive.
Inspect these bees to determine if their tongues are sticking out. Bees that die from poisoning die with their tongues sticking out. This can occur if they accessed some stores containing poison. This can happen with nucs and it’s not a bad idea to remove any frames of honey that come with a nuc as well.
Things to Check on the Frames
Here are some important factors to check when you look at your frames.
- In relation to where you found the cluster, where was the nearest food located?
- Could you find the queen?
- Were there young or old bees clinging to the frame?
- Did you find any brood and if so was it in the cells?
- What did you find in the cells?
You may find two different clusters. This sometimes happens when bees have tracheal mites. The bees are struggling to breath and cannot cluster properly because their breathing tubes are blocked.
These are all clues and things to look for when inspecting the frames.
Disease Definitions
Mites bring viruses into the colony and introduce them into the bees when they create feeding sites in the bees or more often, in the larva. Nurse bees doing clean up also spread viruses when carrying out the dead.
- K-Wing : A result of a virus vectored by mites, adults impacted by K-wing cannot fold their wings normally. Adult bee wings are folded one wing over the other and cover the top of the abdomen. The wings of adults with K-wing are partially open and form a “k” shape.
- Colony Collapse Disorder (CCD) : With CCD, most adult bees are absent from the hive, with a few dead bees in or around the hive. You normally find honey and pollen stores as well. CCD does not normally affect the hobbyist beekeeper. CCD affects commercial operations, often at the cost of a very high percentage of colonies.
- Snot Brood : Sometimes beekeepers come across this term and are not familiar with its meaning, so I include it here. Snot brood is a spotty brood pattern and consists of a mixture of brood diseases.
- Hairless Black Bee Syndrome (CBPV Chronic Bee Paralysis Virus) : This disease is not found in larva and is confined to adults. Bees are found trembling and crawling at the front of the hive. They lose their body hair and appear shiny and greasy. When inspecting a deadout they will be found clustered on a frame or on the bottom board among the dead.
- Deformed Wing Virus (DWV) : This disease was not found in the U.S. until the appearance of mites. Emerging adult workers are stunted and have very distinctive twisted and deformed wings that are not functional and never will be. These unhealthy bees live just a few days. Colonies with DWV normally collapse and when a beekeeper finds a colony in this condition it is often too late to save, though of course there are exceptions. The key to prevention is mite control.
- Parasitic Mite Syndrome (PMS) : Colonies lost in October to December are often lost due to PMS. Some bees, both alive and dead, remain in the hive. Upon inspection a small cluster of adults are normally found on a frame. Stored honey and pollen are usually present and sometimes brood. Disfigured, deformed and stunted wings (that do not extend beyond the abdomen) are typical.
- European Foulbrood (EFB) : The key to differentiating between EFB and American Foulbrood (AFB) is how the two diseases present in the cells. EFB affects young larva and the dead are not in capped cells. By comparison. larva affected by AFB occur in cells that are capped. Another difference is EFB dead are twisted but not ropey, as is the case with AFB. Dead larva gradually change from yellow to brown as they discolor with age. Often times a sour odor is associated with the decay. One more difference between AFB and EFB; AFB dead are often found with their tongues stuck out against the cell wall, which does not occur with EFB.
Symptoms of Colonies Impacted by Varroa Mites
Many beginning beekeepers (and even some experienced ones) are greeted with tremendous disappointment on that first 50+ degree day, allowing them to make that first quick hive inspection of the new year.
Upon opening their hives, a few dead bees are found, with numerous frames of untouched honey and no bees. Perhaps there is a small cluster on just one frame. Or they may have found a similar situation but with frames of honey that had been full into fall now being empty, with ragged and torn edges.
What in the world has taken place here?
The suspect at the top of the list is the ever-threatening Varroa mite. Mites can take down a colony very quickly. In my part of the world (Oregon state) a colony that is lost in December is typically lost to mites. The colony may have seemed to be thriving in September. But if mite numbers are exploding at this same time, as the colony is reducing numbers for winter, then the impact can be dramatic.
“Fat bees”, the bees that will see the colony through the winter, are severely impacted by Varroa and the viruses they vector. They quickly become incapable of seeing the colony through until spring.
But how do you know for sure it was mites? Here are some things to consider while conducting your post-mortem.
- Look at the bottom board for mites. If the colony was lost due to Varroa you will find mites in the debris, often a substantial number of them.
- Inspect the dead bees. Sometimes you not find many dead bees within the hive because the colony worked hard to remove them, until their numbers were reduced to the point the colony died. Go through the bees on the bottom board and even those outside on the ground in front of the hive. If you can find bee with deformed wings you have a strong indicator of mites.
- Examine the brood frames. Bees that died with their heads up while emerging were possibly weakened by Varroa. Bees in cells with their tail ends up generally died of starvation.
- Inspect empty brood frames for guanine. Guanine is an amino acid and mite excrement is about 95 percent guanine. It appears as white spots on the top of brood cells. With the sun at your back, to assist in observing inside the cells, hold up a brood frame and tilt it away from you. If you see bright white deposits adhering to the inside of brood cells, normally at the top of the cell, you have clear, solid evidence of a Varroa infestation. Do not confuse the guanine deposits with bits of wax that may have fallen onto the bottom side of the cell when bees were opening stored honey.
- Inspect any remaining frames of honey. Lots of honey and few bees can indicate Varroa. Also, take note that a hive with no or few bees and honeycomb with jagged edges is a clear sign that the hive was weak or already dead and was invaded by robbers.
Best Approach to Solving the Mite Problem.
Regardless of what approach a beekeeper takes to dealing with the Varroa mite issue, it is imperative to learn and fully understand the honey bee life cycle. This includes both the individual life cycle and that of the colony.
The beekeeper should also fully understand the mite life cycle inside and out. Then a study and understanding of how these two life cycles fit together is the key to successfully managing the Varroa problem.