Completing hive inspections can be one of the most important tasks you’ll complete in your bee yard. Being able to open up the hive and take note of what’s happening inside can give you a much greater understanding of your honeybees’ health. It’s the perfect time to interact directly with your bees and feel the calm of the magic moments you get to spend watching them buzz about doing their work.
But despite the magic that each new interaction with our bees may bring us, hive inspections can still be challenging. You’re outside in the hot sun moving around heavy boxes and equipment and wearing (often heavy and hot) protective equipment to keep yourself safe.
Letting the heat and challenges get to you while you’re out in the bee yard is never good, our bees can sense and often react to our frustrations. To help keep yourself and your bees calm, and to make inspections easier, we’ve put together a few tips and tricks that might help.
Hive Inspection Techniques
Even if you’ve been beekeeping for decades by now and have picked up plenty of useful tips and tricks along the way (please feel free to share some of your own with us!), you never know what new or uncommon techniques out there might make a world of difference in your operation.
Some of the techniques below have been around for a long time and are commonly seen in many bee yards of hobbyists and commercial beekeepers alike. Even if you practice some, you might be surprised by a couple that are new and different, they’re certainly worth trying in your own bee yard!
- Make a Plan – Before you light the smoker and head out to your hive(s), know what you hope to accomplish and ensure you’ve got all the necessary tools with you. Even if things don’t go perfectly according to plan, getting prepared as much as possible can save time, effort, and stress.
- Light the Smoker in Advance – Just in case bees are feeling testy as soon as you approach the hive, having your smoker lit before you get too close can help keep everyone calm from the outset.
- Take Inspection Notes & Photos or Videos – Whether you prefer a journal and a pen or to take photos of each frame you inspect, making note of what you saw makes it much easier to know what’s going on with your colonies over time. You can even video your whole inspection, just train the camera on the frame area so you can see all that happens, and you’ll be able to say aloud what’s happening and what you see to make note of later once you’re back inside.
- Use a Feather to Brush Bees Away – If bees are concentrated in an area of the hive or frame that you need to see or work in, brushing them gently can move them away from the area. Bee brushes are available to buy (linked below), but something that some beekeepers (especially our wonderful & knowledgeable collaborator, Marta) find that using a goose feather provides a gentler approach but accomplishes the task of getting bees to move without being agitated. Though you could use one you’ve found outside, you can purchase feathers online easily that are reusable and can be washed. Give it a try yourself and you might find yourself adding a few different feathers to your bee jacket pockets.
- Keep the Opened Hive Bodies Covered as Much as Possible – After pulling the hive components apart to look through frames, do your best to keep the hive bodies covered. Your outer cover can easily cover the stacked hive bodies you’re not working in. In the box that you are actively inspecting, a cloth inner cover provides a way to cover frames in just the part of the hive you’re not accessing. Keeping the cover over the hive helps to keep the temperature and light at a more natural level and makes for calmer bees. Using a cloth inner cover also protects the hive from robbers being able to smell and access exposed frames.
- Keep Yourself Calm – We’ve said it before but it’s an important enough tip to repeat! Staying calm while inspecting your hives and around your honeybees can have a huge impact on the experience you’ll have with them and how they feel about you. Staying calm and moving slowly and gently helps to keep them feeling at ease and less likely to feel defensive, and like they need to attack.
- If Bees Do Become Agitated… – There are two main methods for calming down angry and agitated bees that may be on the defense:
- Use Smoke on Bees, but also on Yourself and Your Hive Tools – Bees rely on pheromones to communicate how the colony is feeling or should be behaving. When one is squished by a beekeeper (usually accidentally) or when they sting and their glands are left behind, an alarm pheromone is released. This tells other bees when and where to attack (which is immediately). If bees sting your gloves or jacket, or even a hive tool that’s accidentally crushed a bee, applying some smoke to that equipment can help mask some of those pheromones. If a stinger is in your skin, walk away slowly and calmly, remove the stinger, and smoke the area around the sting to help mask the scent.
- Most beekeepers learn about the importance of using a smoker quickly in their beekeeping journey, but if you want to learn more about how you can make the best of using your smoker, check out our article here.
- Keep a Spray Bottle with Sugar Water Nearby – In addition to your trusty smoker, keeping a spray bottle with 1:1 (or more diluted) sugar syrup to lightly spray on bees can help to distract, calm, and even entice bees into an area. The syrup on bees will also initiate grooming behavior, keeping bees busy and in one area. Adding a scented supplement to the sugar water like HiveAlive (also available in a 500ml option) or Honey-B-Healthy can help to mask alarm pheromones, too, and further encourage bees to an area when spraying it on bare frames and foundations, or the bees themselves.
- Note: The essential oil additives in these supplements can also help to keep sugar syrup from molding when used in hive top or in hive feeders.
- Use Smoke on Bees, but also on Yourself and Your Hive Tools – Bees rely on pheromones to communicate how the colony is feeling or should be behaving. When one is squished by a beekeeper (usually accidentally) or when they sting and their glands are left behind, an alarm pheromone is released. This tells other bees when and where to attack (which is immediately). If bees sting your gloves or jacket, or even a hive tool that’s accidentally crushed a bee, applying some smoke to that equipment can help mask some of those pheromones. If a stinger is in your skin, walk away slowly and calmly, remove the stinger, and smoke the area around the sting to help mask the scent.
- Time it Right – Inspecting a hive at the right time can make it much easier on you. For instance, unless you’re treating with oxalic acid (and want to get to as many bees during the dribble treatment as possible), it might be easiest to inspect when the foraging bees are out and away from the hive. Having fewer bees inside can make it much easier to manipulate frames and less grumpy bees to deal with. The weather plays a factor in things, too. If it’s a cloudy day, more bees will be inside and that means more guards and defenders to work around.
- Give Bees Freedom to Build Drone Comb on Plastic Foundations – In plastic frames or foundations, honeybees are given a rigid surface with raised cell imprints to help get them started building comb. Standard foundation comb is sized based on bees’ typical worker bee cell dimensions. That’s why bees often build drone comb off the bottom of frames with plastic foundations, so they can make cells that are wider than the plastic cells are. To help prevent this, you can cut out a 2.5 – 3 in. x 6.5 in. rectangular space (give or take a bit) in the bottom lower part of plastic foundations from a couple of frames per box in the brood nest. This gives the bees a chance to build whatever size cells they need, but will often use the cutout space for drone cells.
- If bees do build drone cells there, it gives you the perfect chance to monitor for and trap some varroa mites. As we know from our recent Varroa Snippets, mites prefer to lay & reproduce in drone cells. After the section of drone cells are capped but before the drones (& mites) emerge, simply cut out the 2.5 – 3 in. x 6.5 in. section of the drone comb and you’ll remove the mites with them. Save those sections of drone comb for your own chickens or a friend who has some, they absolutely love snacking on drone larvae!
- Bees will sometimes use a cutout space for swarm queen cells, too, as the space allows them to more easily create the larger cell that’s required for a queen to develop. Using these cutouts in brood nest frames can make it easy to spot swarm queen cells. If you have the cutouts in some frames and think you might also have swarm queen cells, they’re likely there!
- Keep frames with drone cutouts on the outskirts of the brood nest. You can add a mark to the top of the frames with drone cutouts to easily identify them when you’re quickly looking for drone cells and/or queen cells.
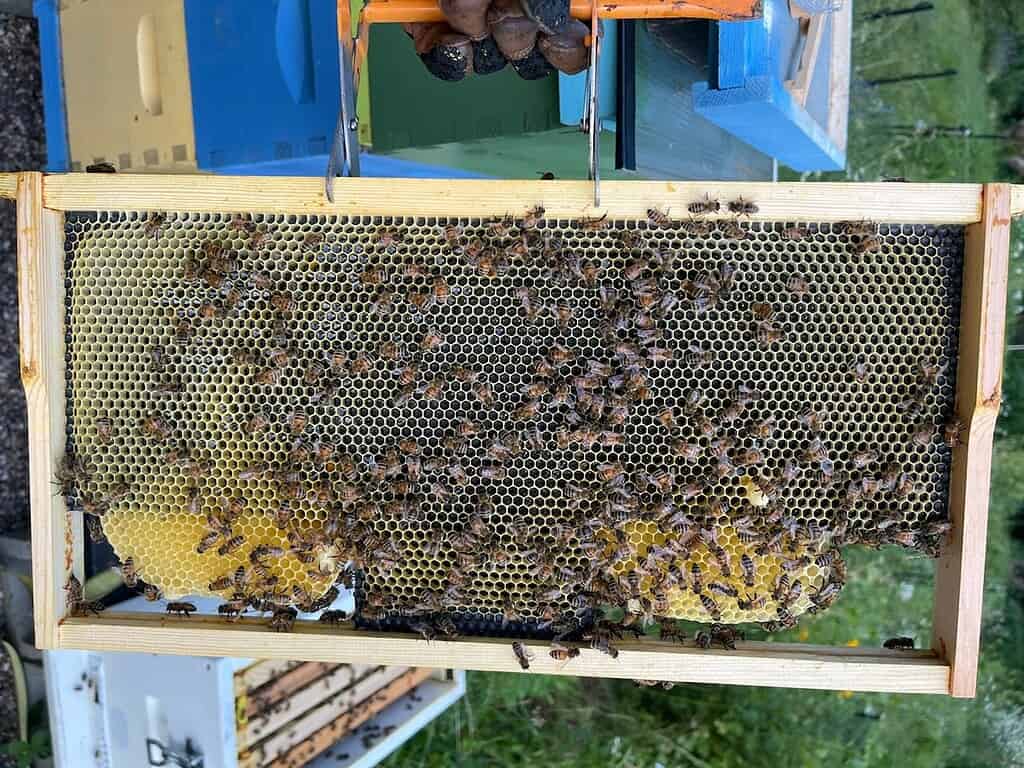
A frame with cutouts will look a bit like this one:
- Cut a Small Corner from all Plastic Foundations – Bees will often use a cutout space in plastic foundations (especially a small one at the corners) to give themselves an opening in the wax, spanning through as many frames as possible. This “channel” provides a way for them to walk and move more easily throughout the hive. It also increases their ability to communicate through vibration better with other bees. * If you use plastic frames or foundations, in addition to the larger drone cutouts, consider cutting out a small corner of each piece of foundation to give your bees this channel, too. *
- Add Beeswax to Plastic Frames or Foundation – To get bees interested in plastic foundations or frames, apply a coating of beeswax (or purchase frames or foundations with a heavywax coating). It will help entice them to the new, empty frame area and encourage them to begin building comb. If you previously had a heavywax coating on stored foundations, the beeswax smell may have dissipated slightly, so you can always add another layer of melted beeswax yourself at any time!
- Make Sure They Have Ample Space – This one is especially important in the spring and early summer months as bees are rapidly building up their nectar stores and brood rearing. A good one to keep in mind is the 70% box capacity rule: once 7 out of 10 frames (using Langstroth standard 10-frames as a reference here) are full of brood or nectar, it’s time to add an additional box with open frames so that they have enough space to continue expanding. This can help prevent a colony from feeling the need to swarm.
- Avoid Crushing Bees When Putting Boxes Back Together – When placing hive bodies back together in their original stacked position, there are often bees congregating on the outer edges of the body you’re about to stack a box atop of. If smoke or sugar water doesn’t work to keep them away from the edges, you can set the box back in a way that keeps from squishing as many bees as possible. Before setting the box down atop the one below it, rotate the box roughly 45 degrees so that it’s offset from the box below. This touches the two box edges together at minimal points compared to placing it directly centered. You can then slowly turn the box back to its rightful position, giving bees the chance to move out of the way of the rotating hive body. This short clip by Heritage Bee Co. does a great job of showing how this can be done.
Helpful Tools & Equipment
Beekeeping requires a wide variety of equipment, like the components used to hive the colony, tools that help a beekeeper better manage tasks, and medication application tools or appliances.
Here are a few tools, some commercially available and some DIY options, plus a bit about how they help complete beekeeping tasks:
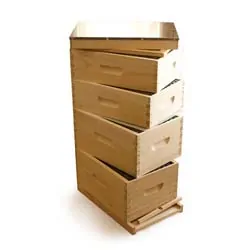
- Frame Holder – A frame holder attaches to a hive body (8 or 10-frame wooden hives) and can hold frames while you easily inspect them and set them aside as you work through other frames in the hive. For easier storage, a collapsible option is also available.
- Keep an Empty Nuc Box with You, too – An empty nuc box makes for an easy way to store frames as you’re inspecting other frames in the hive. It also gives you the chance to keep the bees on those frames covered, safe, and calm. Nuc boxes are available in the PerfectBee Store with a plastic option here or polystyrene option here, too.
- Hive Tool – Hive tools are designed to help you with a wide variety of tasks in the bee yard. Whether you’re prying up frames, scraping propolis or burr comb, or even removing nails from frames, a hive tool can help you accomplish the task. We carry a wide variety of hive tools in the PerfectBee Store, but a favorite of our customers is the hitchhiker hive tool, it really does it all!
- Hive Tool Belt – Do you often find yourself searching for a good spot to put your hive tool down (and rarely find one)? Or maybe you’ve lost a couple out in the yard? Beekeeping suits and jackets are wonderful, but hive tools don’t always stay in their pockets very well. A hive tool belt has strong magnets to keep it stuck by your side as you do all your beekeeping tasks.
- A Goose Feather – As mentioned above, using a feather can calmly and gently move bees without agitation.
- Bee Brush – If the feather method isn’t for you, give a bee brush a try. It can help you to move bees effectively, especially when working to harvest honey from supers.
- Magnification Tool – An old-fashioned magnifying glass or our lighted glasses can really help take your inspections to the next level. Whether you’re looking to spot a fast-moving queen or tiny eggs, they’re all small and can be tough to see. Make it easier on yourself and see more of what’s happening in the hive!
- Smoker – Likely the most widely recognizable piece of beekeeping gear, a smoker can really help to keep your bees calm. Use fuel gathered from out in your yard like twigs and dried leaves to keep your smoker lit or opt for something easy that’s ready to use and has a long-lasting burn with our cotton smoker fuel or baling twine.
- Protective Clothing – Most beekeepers know the importance of protective gear, especially if they’ve dealt with a grumpy hive, but this is a good reminder to keep yourself protected when out in the bee yard! Even if you have years of experience and feel calm and at peace with your bees, and even if they are the gentlest creatures typically, a colony’s mood and behaviors are impacted by many, many factors. Any colony can become aggressive very quickly if they feel threatened in the right way. Many bees attempting to sting at once, especially around your head and neck, can become very dangerous without protective clothing.
- A Cooling Scarf – This one’s not exactly a common part of a beekeeper’s tool kit, but perhaps it should be! As mentioned above, beekeeping can be HOT, especially in full protective gear. Consider adding something like a cooling scarf or battery-powered fan to your beekeeping gear to help you keep your cool in the bee yard.
- Painter’s Tape – Even if you aren’t painting hive bodies, this surprisingly helpful tool can come in handy in a variety of ways in the bee yard, especially during the winter months. Keep a piece of painter’s tape with you to cover any large holes in hive bodies or holes where corners have chipped away. During the winter months, bring it out when you must do a task that may break the propolis seal, like adding supplemental feed. Placing some painter’s tape on the seam between hive bodies can help keep cold air out. It can even help in an emergency robbing situation when you don’t have an entrance reducer with you but need to help them reduce the entrance they must defend. Or, add a sharpie to your toolkit, too, and use it to make quick notes on the outside of hives for the next time you return.
- Bring an Empty Container (with lid) – Whether it’s an old Tupperware container or a ziplock bag, bringing something with you to carry back any wax scrapings or removed queen cells is always a great idea. Leaving wax and its wonderful scent behind near a hive can encourage robbers to come into the area and find your hive. Plus, if you bring it home and collect enough of it, you’ll have beautiful beeswax to later render and make candles from!
- An Uncapping Fork – Even if you don’t plan to harvest honey, an uncapping fork is a great addition to any trip to the bee yard. It can help remove cappings from drone cells to check for the presence of varroa mites and help to remove honey cappings to prevent a “honey ceiling” in your hive.
- Queen Tools – Even if you don’t have plans to specifically find, catch, or mark a queen on this trip to the bee yard, it helps to keep all your queen manipulation tools in one place (like a ziplock or container to keep them safe, clean, and separate) and bring them on each trip to the yard. A push-in queen cage or clip can help keep the queen contained safely while you inspect other areas of the hive. Plus, if you have a new queen that needs a mark, you can’t mark her unless you happen to bring the marking pen and tube or marking cage with you!
- Alcohol Wipes & Spray – A common household item not often mentioned in beekeeping, but it should be! Alcohol wipes and even hand sanitizer can really help to get rid of sticky honey or propolis while out in the yard and can be used to clean and sanitize tools and equipment. Sanitizing tools is especially important when working between multiple hives or bee yards to avoid passing on any potential diseases.
One of our experienced PerfectBee collaborators (located in CT), Marta, was kind enough to share her “toolkit” with us. Here are the tools she takes with her to the bee yard:

What’s in your beekeeping toolkit? Feel free to send us an email and let us know what tools and techniques you use and love in your bee yard!
If you’re a Colony Member, please start a discussion & let us know about your toolkit & tips of your own on the Colony Forum!
Learn More
The above tips and tricks are sure to make your trips to the bee yard a little bit easier. But for some further in-depth knowledge about inspections and specific beehive situations, learn more in the resources below.
- Big Issues to Check at the Hive Inspection – Find out about the most common concerns beekeepers are keeping an eye on when completing inspections
- A BetterComb Hive Inspection – How does Bettercomb work when placed in a beehive? Find out more in this detailed hive inspection video.
- Hive Inspections and Recordkeeping – In this “A New Beekeeper’s Journal” post, you’ll learn more about what to keep track of after completing your inspections
- Inspect Often When You Start Beekeeping – Find out in this blog post why inspecting often (especially as a new-bee) can be beneficial to both you and your honeybees
- Tools for Beekeepers to Consider – Find more details in this blog post about preferred beekeeping tools and how they can help in your bee yard.
Colony Member Resources
Member-Only Academy Lessons:
- An Introduction to the Beehive Inspection – Dive deeper into the beehive inspection and learn more about what to be on the lookout for in this detailed Academy lesson
- Learning From Deadout Inspections – Though finding a colony that has perished is always a sad part of beekeeping, it’s one that we can all learn from. Find out how in this lesson.
- Inspecting and Understanding the Brood Pattern- Going even further into the hive inspection with this Academy lesson, we focus on learning what you’ll find in the brood nest and understanding its frame patterns.
Discussion Threads in the Colony Forum
Colony members, don’t forget to check out the Colony Forum for tips and tricks from beekeepers from around the country. If you struggle with it in your bee yard, someone else has likely asked about it, too. Search for your question and see what members may have already asked and answered about it!
Here are just a few examples of the topics where members share tips on inspecting their hives, and their tricks for managing some other specific in-hive situations and concerns:
- Damaging drone cells when inspecting hives
- Should I inspect?
- 2nd Inspection/Serious Comb/Ventilation?
- 1st Inspection of the year and… 🙁
- Monitoring Hives
- Water for bees this year
- Rotating Hive Boxes
- Beeswax Rendering
- Protecting hives against cold and wind
- Things to consider when making Fondant
Not yet a Colony member but have an interest in joining our awesome community of beekeepers working together to learn more about beekeeping? Learn more about Colony and all of the opportunities to connect with other beekeepers and learn more with our resources through membership here.