Introduction
In the first lesson of this two-part topic, we looked at the various forms of honey you might want to harvest, as well as some of the logistical factors you will need to consider. Now we cover the specifics of harvesting honey.
We look at the ways in which you can collect and prepare frames from your hives, the equipment choices available to you, and the main methods for extracting your honey.
Harvesting honey is a very enjoyable part of beekeeping. Providing you keep your bees in mind and don’t take too much honey, it is a sweet reward for all that effort, both from your bees and you.
The harvesting of honey can be divided into three main steps:
- Collection of frames from your hive
- Uncapping
- Extraction of honey from the frames
Let’s look at each of these in turn. In this lesson, we will assume you are interested in extracted honey, rather than comb or chunk.
Note: There’s another optional step you could add to the three above, about how to jar and package your honey. This is probably most relevant if you plan to sell your honey, but we will cover that elsewhere.
Legal Stuff
Let’s get the dry – but essential – legal stuff out of the way first.
If you plan to sell honey, you are bound by local and state regulations regarding the production and selling of food. This is reasonable. When you purchase honey from someone, you do and should expect an assurance about the safety of that food. Therefore, if you plan to sell honey, check with the local authorities.

We will cover the implications of selling your honey elsewhere. Here we will assume you will be extracting honey for your own use.
Type of Hive
As an introductory lesson, let’s describe the basic principles and processes associated with extracting honey. We are assuming that you are using a Langstroth hive for now.
Bees First, You Second…
First Year Caution
This is a good time to remember that the primary reason honey exists is for the benefit of the bees, not you! A broken record we may be, but leave your first-year bees to enjoy and survive with all the honey they create.
After they have overwintered for the first time you can start thinking of the honey rewards coming your way!
How Much to Leave for the Bees
There is no simple answer to this since it depends on many factors including the race of bees, their ability to overwinter, your location, and certainly the length of the winter.
Although we can’t offer a precise estimate, a general guideline averaged nationwide might suggest 70 lbs of honey to get through the winter. A single, deep frame of honey will hold around 7 lb of honey, so you can roughly consider a 10-frame deep box full of honey to be what your bees will need. But, again, find this only in the second year.
First year = honey for the bees!
Removing Bees from Frames
Overview
While most people love honey, few enjoy the crunch of a bee on their toast! So, step one in honey harvesting is to ensure you have bee-free frames! There are a few ways to do this, from the simple to the clever.
Shaking or Brushing Frames
The most obvious way to remove bees is simply to brush them off. Place a spare box alongside the hive. Then remove a frame from the hive and brush off your bees, near the entrance.
Next, place the frame, now free of bees, in the spare box and cover it with a board or towel. Leaving this open is an invitation for robbers to smell an opportunity.
With the frame in the spare box and covered, go back to the hive, get another frame, and do the same thing over.
A note about brushing bees. We’ve seen how bees have an incredible series of behaviors and “secrets” in how they live their lives. Here’s another one. The cells in honeycomb are built horizontally, which is unusual for social insects who generally build vertical cells. If the bee’s cells were perfectly horizontal there would be a risk of nectar seeping out. In fact, each cell in the honeycomb is slightly slanted upwards, at an angle of around 13 degrees.
For this reason, when you use a bee brush to remove bees, brush UPWARDS gently and with short strokes. This minimizes the possibility of injuring your bees.
Apart from brushing, another option is simply to shake the bees off or a combination of brushing and shaking.
This is, of course, a simple way to remove your bees but be aware that this can take a while since you are dealing with a frame at a time. Additionally, the very process has the potential to work your bees into a frenzy – they want to be back doing their job! If you are wearing good protective clothing though, you will be safe.
Blowing Bees Off Frames
Another option is to blow your bees off the frame. We don’t mean to lean over and empty your lungs! We mean using a bee blower. Some people even use leaf blowers. It is technically an option but we just don’t recommend it for the new beekeeper. It can anger and disorientate your bees.
One more thing. We think beekeeping is a peaceful, quiet, and sometimes almost Zen-like hobby. So we don’t recommend this…
Bee Escapes
Thankfully there’s a more gentle, easy way to rid your honey boxes of bees. This approach requires a little more patience but is less chaotic and calmer for both your bees and you. In some ways, it is a reflection of the calm, relaxed ways of beekeeping.
A bee escape is essentially a one-way street for your bees. You place the bee escape between a) the boxes where you want your bees and b) the boxes with the honey that you want to empty of bees. This eventually ensures virtually all bees are out of the honey boxes after a while – they can get out but cannot get back in!
You install the bee escape, wait for up to a couple of days, and then return to pull out frames from the honey boxes, which should be largely free of bees. Note that waiting longer than a couple of days may be an invitation to your bees to figure out how to get back in, so allow no more than 48 hours.
There are various types of bee escape available, such as an escape screen. The process is easier to see than to explain, so check out this video.
Uncapping Frames
With your frames retrieved from the hive and brought inside, the first step is to uncap your frames i.e. to remove the wax caps off the cells.
It is best to uncap and extract your honey soon after you pull your frames from the hive, although it is not essential. If that is not possible, store your honey in a reasonably warm space. Honey is far easier to extract when warm and less likely to granulate. In short, consider doing the whole job – the collection of frames, uncapping of frames, and extracting of honey – all at once.
Uncapping is a rather simple job and involves the use of an uncapping knife to slice off the caps. Heated uncapping knives can really speed the process along, especially when you have many frames to harvest. For a smaller number of frames unheated uncapping knives do the job just fine. Another very popular choice is the purpose-built comb uncapper, which holds the frame in place while an uncapping knife is used.
Here’s a neat video of uncapping a frame – and a rather beautiful frame of honey, at that!
Extracting Honey
Overview
With your frames uncapped, it’s time to get some honey! You have a number of choices, depending on the time available, budget, and other factors.
Crush and Strain
This is a low-tech approach that works very well for small volumes of honey, as is normally the case for most new beekeepers. It relies simply on the comb being crushed to release the honey and then allowing gravity to work its magic.
One way to use the crush and strain method is with a bucket strainer system.
Spin Extractors
As your honey harvesting becomes more frequent, you may wish for a more efficient process than simply waiting for gravity. Roll up, centrifugal force.

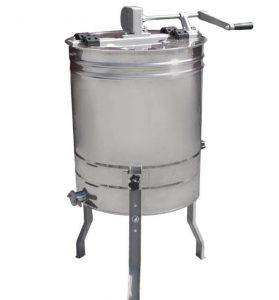
Spin extractors are popular among many beekeepers as a very efficient and quick way to extract honey. The uncapped frames are inserted into the extractor and then spun around at a quick rate. This means that the honey pulls free of the comb, hits the insides of the extractor and then drops down into a collection chamber. A honey gate is then used to release the honey at the bottom. The resultant honey may retain some wax but it is a simple task to filter it into bottles.
When Beekeeping Takes Over…
If beekeeping becomes your thing in a big way, you have lots of honey to harvest and you also have deep pockets, then a powered extractor can save you a lot of time and elbow grease.
The following video happens to show a power extractor in action but is also a delightful explanation of harvesting honey.
